Showing posts with label 3D. Show all posts

Wednesday, December 19, 2012

More Stitching


 I spent some time in my studio yesterday and completed my 3D flowers.   

It took alot of cutting and turning, stuffing and quilting to get them to the second stage.   The hardest part was matching them up to give the most pop of colour.


Finally, they got their three dimensional shape and turned into a lovely bouquet of flowers!


Thursday, November 22, 2012

New Fabric and an Art Quilt

Just arrived at my doorstep - Flutter!  The Quilted Fish's latest fabric line and it is gorgeous.  Riley Blake Fabrics carries it and no doubt it is selling like crazy.   Amanda has used reds, creams, oranges and blues this time. The designs are so unique on each piece, that it is like eye candy that you just can't stop looking at!


 A week ago I did this tutorial over at C&T Publishing blog.   


Last night at our guild meeting, an amazing quilter surprised me by showing this quilt using my tutorial.
I think she did  a fabulous job, don't you?


Monday, August 27, 2012

Quilting Arts Challenge

I have decided to try and enter more challenges this year.  One that came up is the Quilting Arts challenge.  I am an avid subscriber to their magazine and enjoy all the different opportunities they provide in their magazine.     This challenge is to produce an ATC - artist trading card.  The theme is 'What's In Your Heart' and it must be 3 1/2" x 2 1/2" and it will be swapped with another.

I have never made a quilt that size before.   I do know they like embellishments on their challenges, so I raided my kids tool boxes for unique embellishments.   Don't even ask if they are 3D, you know the answer=)

I started by cutting and stitching, recutting and more stitching.  I cleaned up the edges too.   How do you finish a quilt that size?  Please tell me that you don't actually bind it?

Then added my bling.
What do you think?   It is copper wire and copper looking beads that are attached to it.


Friday, July 27, 2012

The Needle and Thread Network

I am over doing a guest post at The Needle and Thread Network.  This blog was designed to bring Canadian quilters together, and today they are featuring me.  I am showing some new 3D art quilts over there.

If you are joining me from TN&TN then welcome.   Take a look around and if you like what you see, please hit the 'follow' button.

Remember I told you I was making a quilt out of something made from wood.   None of you guessed the right answer.  A few said toothpicks, I did that this past spring:


Here is the one I was working on....

Can you tell what I used?   It is wooden clothespins!  They have been covered with mini ric rac and ribbon and buttons.   Each corner has a polka dot button.   


 One nice thing about clothespins is that they have holes provided for you to stitch through.


I am also doing a little giveaway in celebration of Canadian quilters.   You don't have to be from Canada to enter though!   I adore all of you=)  I picked up these beauties at Quilt Market and they are from Art Gallery Fabrics.   I really like this company, the fabric has a very soft supple feel to it.   The winner will win a fat quarter of each fabric shown below.  This is all from the same collection.


All you have to do to enter is leave me a comment telling me where you are from.  If you don't want to do that, tell me your very favourite junk food.   Mine is stale red licorice.   And it has to be stale so it is nice 'n' chewy.  I will pick a winner on August 3, 2012.   Good luck and thanks for stopping by!

Tuesday, April 10, 2012

Working, working, working...

I am creating as many samples as possible for my upcoming workshop.   I hope to finish this one in the next day or two.  It is my favourite 3D flower art quilt, I think.  
Here are a couple of glances at it.


So far I have used ric rac, lace, buttons, toothpicks, fabric of course, and vintage jewelry.  Pretty much everything but the kitchen sink.   Nope, wait, I did use something from the sink!   I'll show you that in a couple of days!

Wednesday, March 14, 2012

Lace on My Art Quilt and a Vote

Who knew lace could be so versatile in art quilts?   It covered my rather harsh black and white background and made it more muted and soft.   I am discovering that it due to its light airy texture, it gathers nicely.   I am making more 3D flowers but felt they needed something behind them.  I took some funky yarn and stitched it onto some 5" wide lace and gathered that into a circle and voila!   I have a lovely backdrop for my flower to rest on.   It gives the flower some body yet still blends in and doesn't take away from it.


I am auditioning some jumbo ric rac as stems.


Also have two more 3D flowers on the go to get attached to a background.


And some of my hand dyed fabric ironed, cut and folded.

Can you tell I am prepping for a workshop?   Better get back to work, have some busy months coming up!

Sew Cal Gal has the 2012 Golden Quilters Awards up now till March 31st.   You can vote for the best of the best in the quilting world.   (and I even know a super star on the list=)  When you get to the best online quilt store, be sure to check off The Intrepid Thread, because it really is.  Julie always has coupons for saving money, her sales are ridiculously crazy, and she has giveaways every single week.   Ok, I should put in a disclaimer, so no one gets upset, I am sure the other online stores are good too, but Intrepid Thread is really super=)


Friday, March 9, 2012

A New Art Quilt

I am furiously working on a new art quilt showing my 3D flowers.   When I got the notice that my quilt got into Paducah, I realized I was planning to use that one to show one of my techniques at my upcoming workshop in April.  

I needed to replace it, but had limited time.   I remembered I had sewn together a black and white background and then put it away.  I pulled it out, but realized it was just too harsh to have my blue 3D flowers on the top.  Unfortunately, I never thought to take a picture, but you can see the colour of the binding is one of the fabric pieces in the background.   Anyway, I had some tulle and laid over it, but that didn't give me the effect I was looking for.  Then I found a piece of lace that did the trick.  I put that over and did a stippling all over it.   I have to finish binding it.

Next I will lay my flowers on and see how it looks.

I have 15 m of fabric being dyed at the moment.  I just love seeing what fabulous colours come out when it is done.

Sunday, January 15, 2012

Art Quilt Needs a Name

I quilted my fingers off for 2 days straight and got my big flower quilt all quilted.   I used all these bobbins up plus 4 more.   Alot of colour on this quilt and I love it so much!   I took so much time and care in pinning it, and may I add pain.   The majority of the top is not cotton but canvas.   Let me tell you how hard that was to pin.  It took two solid hours and I had a massive blister that broke by the time I was done, but it was soo worth it.

This is just a small section of the back of the quilt.    I have to finish the centre and  attach it.  Don't you love my hand dyed fabric I am using?


I think the task I have the hardest time with is squaring it up.  I can get the sides cut in a straight line, but boy do  I ever have a heck of a time getting it to square up evenly.   

I went ahead and got all my binding ready.  I am using my hand dyed fabric to match the centre and cut a bunch of colourful strips and sewed them together, ready to go.


The name.   When entering quilts in shows, the first thing you have to record is the name of the quilt.   I don't know how other art quilters come up with their names.   For me, somewhere along the process of making the quilt, the name just comes to me.    

For this quilt, it was going to be a peacock tail until I went to applique it to the background, and then it turned into a flower.  So there went all my ideas regarding peacocks.   I am trying not to panic as I am very, very near the end and nothing is popping into my head.   Probably because it has only been a flower for 4 days, but I ALWAYS have a name by the end of the quilt.   I am so not freaking out!   (translates to:  I am totally freaking out)

Let's hope in the next day or two I have a mind blowing name experience=)

Wednesday, January 11, 2012

3D Embellishing Tutorial - Ribbon


As you know I am somewhat completely obsessed with embellishing.   By that I mean 3D embellishing on art quilts, clothing, kids quilts or accessories.  

Riley Blake fabrics has this great website called Cutting Corners where they post tutorials on quilts, apparel, accessories and home decor.   It is great for ideas and free instructions to make things.  

I have made a couple of quilts for Cutting Corners.  I was chatting with one of the girls at Riley Blake and mentioned my obsession over embellishments.   From that conversation, I am now posting once a month on Cutting Corners showcasing a different embellishment and how to use it!  

For this month, I chose ribbon.   It is one of the most versatile embellishments ever and very under used.   I want to get quilters/crafters using this fabulous product.  

I show you how to make cute ribbon flowers and how to weave the ribbon into fantastic ideas.


Go and check out my tutorial.   (Feel free to leave a comment too=)

Wednesday, December 21, 2011

2nd and 3rd Flower Done

My R & B art quilt is almost done.   It has 9 buttons to be sewn on, and then maybe more on the binding.    But the good news is I finished all three of my 3D flowers.  The second and third ones were all done and just had to be sewn on.   When I laid them out, I didn't like the look, so back to the sketch pad.  I made 2 more just like the first one and I like the flow much better.  


As you may remember, this quilt was supposed to be done for December 1st, and another one finished by January 1st.   There is a chance I will tackle that second one with great guns over the holidays.   But I also have a few deadlines that I have to meet.   We shall see, I may just buy a pound of chocolate covered coffee beans and go crazy=)


I probably won't post now till after Christmas, so I would like to take this opportunity to wish you a Merry Christmas and Happy New Year.  You have no idea how much I appreciate you signing up to follow.   So very much!   Thank you.

Thursday, December 15, 2011

Art Quilt Embellishing

I think time goes on double speed as soon as December approaches.   My art quilt that has to get done very soon, has had little attention to it.
I did get one of the 3D flowers done, and  even attached.  I love it.  It was my first time combining two techniques in the flower and I am pleased with the effect.

You can see by some of the pictures that it is quite three dimensional.


Here is my question to you?  Do you have any quilted items still left to finish up before Christmas Day?


.


Sunday, October 2, 2011

A New Art Quilt

I am working on a new art quilt.   This one had me stumped for over two months.   This is what hung on my design wall during that time.


I knew it needed more, so I took it back down, mixed up some thickened dye and created this.


I put red circles all over it.   Then it hung for another six weeks.  I stared at it every day, thinking it needed something else, and not knowing how to put my focal point on it in a pleasing manner.   I knew what I wanted on there, and have that part made up (3D), but did not know how to get the quilt to flow together and look good.   

Last week, after flipping through books for inspiration, it came to me.   I was a little nervous because I have never cut up the background of a quilt before.   I also knew this had to be improved.  I took a deep breath, grabbed my cutter and closed my eyes.   Kidding!  I did not shut my eyes!

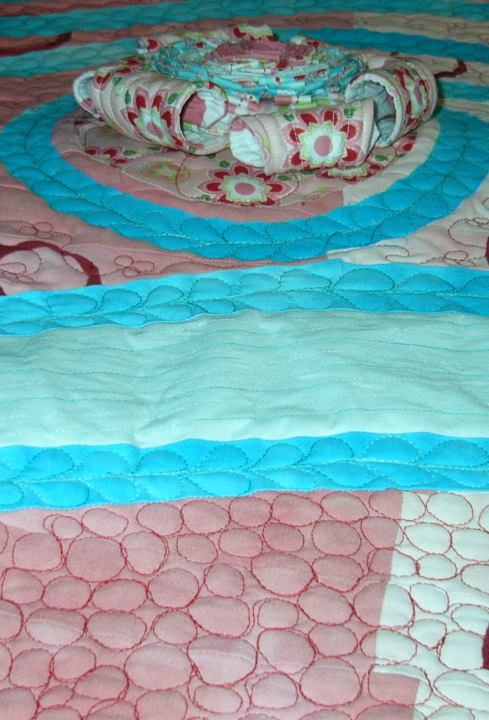
Here is what I came up with.


I am happy with it now.   The darker blue is my hand dyed fabric and the lighter blue is a linen I had in my stash.   I learned quickly that linen can really fray... fast!   

I now have a strong design in my sketch pad, did some work in my Paint program and got some photocopying done.   I am ready for the next step... this consists of circles and ovals.   I do have a thing for them right now.   

Will keep you posted as I progress to the next step.   I think I am only a few posts off till I hit 500, so will plan a giveaway for that celebration!  One more thing, I started a Facebook page, if you feel inclined, can you give it a 'like'.


Wednesday, August 31, 2011

Embellishing with Stamps and Buttons

Most of you know that every art quilt I make has embellishing on it.   My preference is 3D embellishing, but I do like using stamps and different techniques.

I bought a really cool circle stamp yesterday  ( I am also currently obsessed with circles).  
It is going to be for my current art quilt, to be used on the background, to give some variety to it.

I tried out several different ways to apply it.  Here are the results:

This one I put the stamp under the fabric and brushed Shiva Paintstik on the fabric.


I used the same method as above, but with a marker.


I used a brayer and put paint on the stamp, then stamped it onto the fabric.

I love buttons.   I use them on many of my quilts.   Okay, I use them on all my quilts.   But I wanted more from the buttons.  I didn't like that I was limited to whatever colours the buttons were and I had no say in the creation of them.   So I ordered a little button making kit.   Now I can use my own fabric to make buttons.   This is Riley Blake fabric, but I am also going to use my hand dyed fabric too.
How cool is this?


I am definitely using both on my quilt in progress.